Pe-chool officially starts for my daughter today!! We're going to start the day with homemade cinnamon rolls, a good start, I say! The idea of homeschooling Jovie seemed like a piece of cake...until I realized I should probably have a lesson plan, materials, and a quiet place for her to work. I was 0 for 3...the day before I planned to start! So yesterday afternoon, I hit Target and collected extra notebooks, stickers a white board and got planning. Normally, my OCD personality takes over and I'm waaaay ahead of the game but for some reason, I thought I'd wing it and be fine. Yikes. So if you are homeschooling your child for the first time or resuming again this year, I'd love to hear some of your ideas. Granted, Jovie is only four and I have a whole year to see how things go, I really want her to feel like for a couple hours a day, she is in school.
I made a schedule and for three afternoons a week, plan to work on spelling, math, history, art and geography for two hours. Of course, there will be some science, crafts, Bible time, and life lessons sprinkled in as well. I have entered uncharted territory and am as apprehensive as I am excited. But Target was a great place to start!! They have math and reading flashcards, bins and containers for organization and stickers, art supplies and workbooks galore. Whether you are homeschooling or sending your child to school for the first time, it can be overwhelming. Just veering your cart towards the school-supplies section can warrant chest pains. What does your child really need??
Will they suffer tremendously without the "cool" backpack or lunch pail?? And what about school clothes? How DO parents afford it year after year? I am so thankful when I think back on my parents. No matter how stretched financially they were, they made sure my siblings and I had a backpack full of supplies and new clothes to wear. Though kids do appreciate the new trappings that come when the new school year arrives, I think it's the little touches they will remember the most. Rushing me to Mervyn's (remember that place??) the night before an important event at school for a new top, packing my lunch just the right way with a sweet note tucked in, and being whisked away once in a while for an off-campus lunch are just a few things my mom did, not to mention just being there after a rough day. No matter how busy you are, there are always things you can do to show your love and get your little ones ready for school.
Obviously, older kids have different needs than your little ones, and homeschooling vs. sending your child off to school makes for different challenges. What's important is that in the end, if you are doing what you feel is best for your child, you can't lose. So pack that lunch with a little extra love, press those pants with care, and be available to listen to those back-to-school stories. If you wait long enough, they are bound to come. And if you have a wee one you want to start with at home, go easy and forget the pressure to be perfect. Numbers games, letter recognition and beginning to write go a long way. Kids are learning ALL the time, whether you notice or not. And I'll be sharing my lessons too!
How do you stay organized during the school year???
Tuesday, August 7, 2012
Monday, August 6, 2012
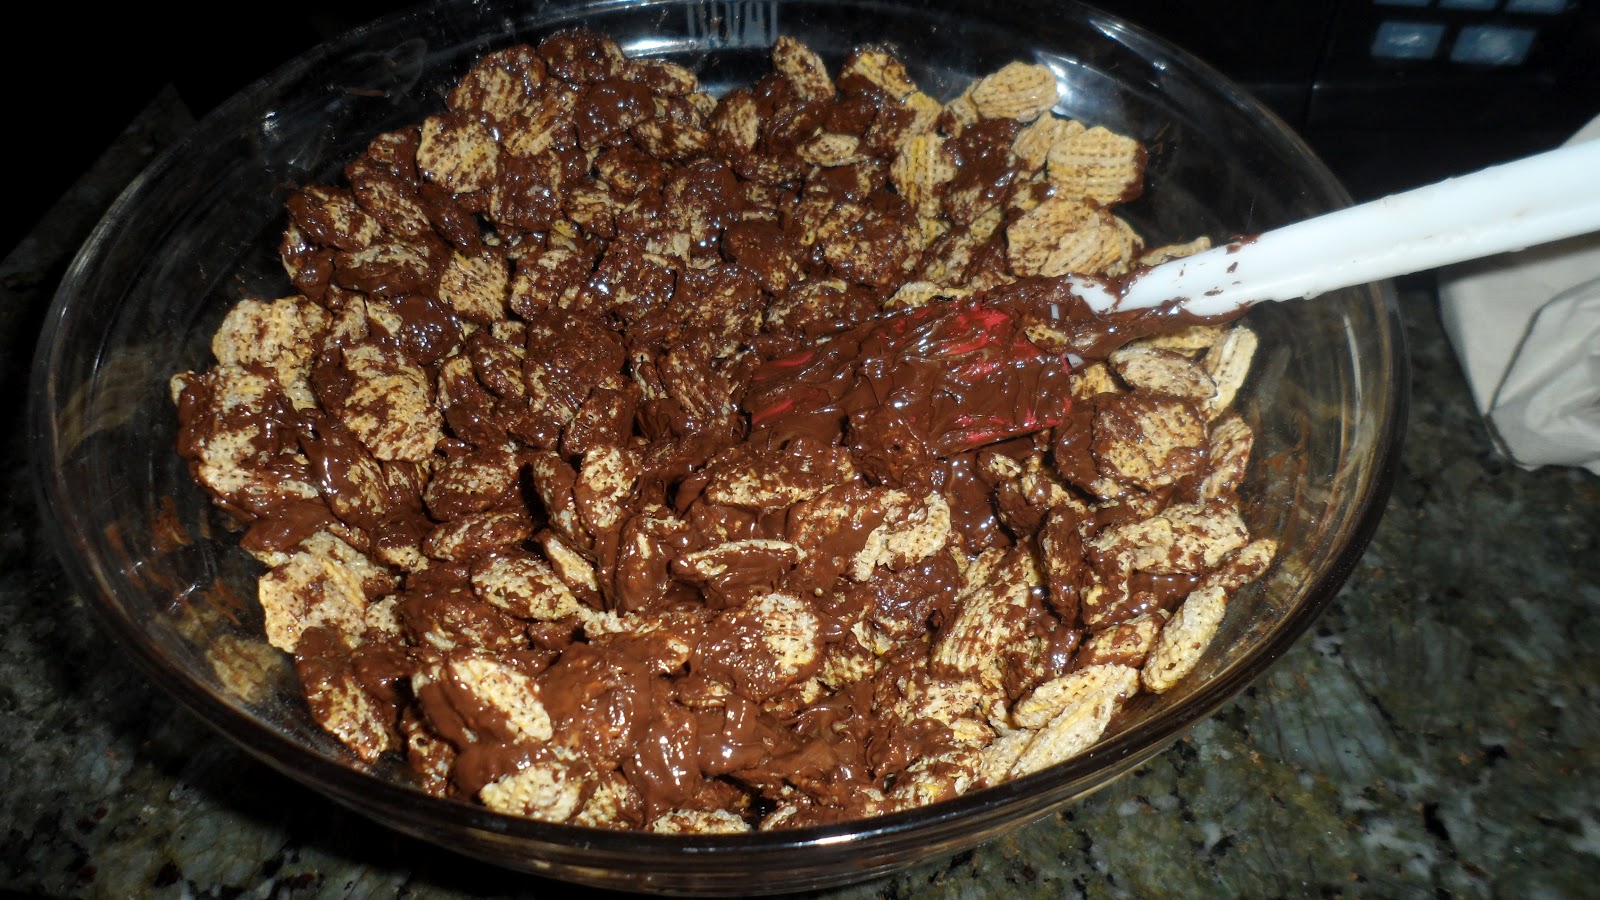
Bananas for Monkey Munch
My kids are always eating. Always. There are the obvious three meals a day but they usually want snacks throughout the day, at bedtime and always ask for dessert. I try to keep them eating a variety of healthy meals, fruits and vegetables and attempt innovative ways to get them to try new things. Ranch and ketchup are always on stand-by! One thing I never have to push is dessert although I do try and come up with healthy(ish) versions of treats they like so I don't overload them with sugar!! One treat I like to make for and with them is Monkey Munch. It's crunchy, savory and sweet...the perfect snack combination like another of our favorites, chocolate covered pretzels! There is something about the sweet and salty combo that keeps us coming back for more. The four of us eat 'em by the bowlful and while it isn't exactly healthy, there are sneaky ways to make it better.
There are different varieties of Monkey Munch and mine has just four ingredients. The simplest treats are always the best. Here is the recipe and a few suggestions to make you feel a little better while eating in copious amounts!
1 12 oz. box rice cereal, such as Chex (or whatever's on sale...you could do whole wheat. I have and nobody seems to mind. It's just a little more crunchy.)
1 cup peanut butter (use all-natural or organic if it makes you feel better. I normally buy Skippy Natural.)
1 16 oz. bag chocolate chips (I use milk chocolate for everything but semi-sweet or dark would be good alternatives...mix things up!)
powdered sugar
Microwave the chocolate on high 1-2 minutes, checking every 20 seconds or so to make sure it doesn't burn. Once melted, stir in peanut butter until creamy then cereal, mixing to coat. (This is easiest with a LARGE bowl or a couple smaller ones. It's a little messy.)
Once combined, I dump about 1 cup powdered sugar over the mix and stir to coat. You could opt to "shake" in a zip-top bag to coat. Add more powdered sugar if desired. Keep refrigerated.
This is a great recipe for a party, your kid's classroom or just because. It also makes a really cute party favor when scooped in cellophane bags and tied with ribbon! I love these simple recipes because you can adjust the ingredients and play with it, change it up and let your kids help. Add nuts, raisins, M&M's...etc. for fun variations. Enjoy!


The finished product..yum!
There are different varieties of Monkey Munch and mine has just four ingredients. The simplest treats are always the best. Here is the recipe and a few suggestions to make you feel a little better while eating in copious amounts!
1 12 oz. box rice cereal, such as Chex (or whatever's on sale...you could do whole wheat. I have and nobody seems to mind. It's just a little more crunchy.)
1 cup peanut butter (use all-natural or organic if it makes you feel better. I normally buy Skippy Natural.)
1 16 oz. bag chocolate chips (I use milk chocolate for everything but semi-sweet or dark would be good alternatives...mix things up!)
powdered sugar
Microwave the chocolate on high 1-2 minutes, checking every 20 seconds or so to make sure it doesn't burn. Once melted, stir in peanut butter until creamy then cereal, mixing to coat. (This is easiest with a LARGE bowl or a couple smaller ones. It's a little messy.)
Once combined, I dump about 1 cup powdered sugar over the mix and stir to coat. You could opt to "shake" in a zip-top bag to coat. Add more powdered sugar if desired. Keep refrigerated.
This is a great recipe for a party, your kid's classroom or just because. It also makes a really cute party favor when scooped in cellophane bags and tied with ribbon! I love these simple recipes because you can adjust the ingredients and play with it, change it up and let your kids help. Add nuts, raisins, M&M's...etc. for fun variations. Enjoy!
Gettin' all mixed up!

The finished product..yum!
Sunday, August 5, 2012
Let Them Eat...Play-Doh???
Being a stay-home mom, I have to come up with A LOT to keep an almost-two and four-year-old busy! We are together 12+ hours a day and if I didn't have a semi-schedule and many activities, we'd all be scaling the walls (I am half the time anyway...can you say ADD??) Not only does keeping the kids busy entertain, teach and stimulate them (and keep them from fighting all day,) it entertains me. I enjoy coming up with new and fun crafts for us all. I try to choose activities that can be tailored to age. For example, water colors for Logan and acrylic paints for Jovie. Stickers and crayons for Logan, glitter glue and markers for Jo. Sometimes this plan backfires as my little-engine-that-could, Logan, is not easily fooled. He wants in on whatever sister is doing so sometimes I have to take a deep breath and let the messes happen. In the kitchen while baking, flour and sugar will coat the floor. They will stain their clothes with markers and paint and they will create enough splatters, fingerprints and stains on the carpets to warrant a HazMat inspection. Needless to say, sometimes you gotta let kids be kids. There's always time to clean up later. I'm usually a pretty good sport, indulging most ideas my kids come up with in hopes they will be busy so I might get something done around the house. The longer they play, and the less set-up required, the better. And if they can both participate in the activity, that's icing on the cake!
Which brings me to the latest...edible play-doh. Recently, I came across a recipe for an edible play-doh. It's fun to make, fun to play with and fun to eat! I didn't even have to tell the kids it was edible; they figured if we were making it in the kitchen like any other recipe, it must be fair game and truthfully, they probably spent more time sneaking bites than playing! It's relitively inexpensive (about $3 per batch), "healthy" (no, it's not necessarily meant to be eaten, but it was snack-time in our house!) and easy...took us just five minutes to make!! Here's the recipe:
1 cup powdered milk
3/4 cup honey
3/4 cup peanut butter
Mix together to form ball.
This recipe makes two "servings" of dough. It keeps well in the fridge but should be taken out a few minutes before play to soften...
***OBLIGATORY WARNING--this play-doh should NOT be given to children under 1 or kids with peanut allergies.***


Have fun!!
Saturday, August 4, 2012
Enchilada Revue
I am a big fan of the enchilada, chicken, specifically. I always have been. The buttery corn tortillas, spicy sauce and melting cheese is a poetic plate of mexican perfection. My hubby is not such a big fan so I took that as a challenge to change his mind. I've made different varieties homemade and also tried a few frozen versions that we happily gobbled up in the name of research! Mike's favorite, hands-down is a Campbell's soup gringo version of the enchilada (recipe to follow). It's easy, fast and thanks to mild green chile sauce, kid-friendly.
My favorite was a Huxtable's fresh chicken enchilada with red sauce that I found at Target. If you like a more authentic flavor and a little kick, this one is a must! I made these ones last night with some chips and guacamole and it was muy delicioso! So whether you go fresh or frozen, these are the perfect, easy meal. Here's the recipe for our family favorite:
8 large flour tortillas
2-3 chicken breasts, cooked and shredded (I use the Crock-Pot but you can bake or boil..)
1 can Campbell's cream of chicken soup
1 can mild green enchilada sauce, any brand
1/2 cup sour cream
1 8 oz. bag shredded monterey jack cheese
Heat oven to 400°. Combine half the enchilada sauce, 1/4 cup sour cream, soup, 1 cup cheese and shredded chicken. Evenly fill tortillas with mixture, roll and place seam-side down in baking dish. Mix the remaining enchilada sauce and another 1/4 cup sour cream and pour over enchiladas. Top with remaining cheese. Bake 15-20 minutes, until cheese is melted. Serve with rice and beans...my favorites are Rosarita black refried beans with Old El Paso cheesy rice (boxed mix). Enjoy!!
 |
| Ole! |
Friday, August 3, 2012
Bonkers for Bake Sales
Jovie has been in karate a little over a year. She started out as a pee-wee and has yet to become an earth-shattering karateka, but she has moved up and is seeming to grasp the concepts and enjoys it. Doesn't really matter how far she's come though, because I am a karate mom nevertheless. It started as a daughter/daddy activity, allowing me to jog or spend some time with my little guy but once she started to climb the karate ladder, it became a little more interesting and I couldn't wait to tag along to get in on the action. What mom could resist her little pony-tailed redhead in a huge mouthpiece sparring with kids twice her age??? Not me.
So while I've gotten caught up on the dirt at the dojo, I've become more involved. Newspaper and M&M sales for new chairs? Yep. Potato salad for the picnic? Sign me up. And most recently, the bake sale to raise funds for an air conditioner...come on. You know I'm in. So I decided on chocolate chip cookies. They are a tried and true crowd pleaser and easy to make in large quantities. I got my cellophane bags and stickers and I'm set! Any reason for baking or making a fun treat is a good reason for me.
Lemonade stands and bake sales are as old as time and as American as apple pie and Girl Scout cookies. They are unifying and bring communities together. Who can say no to sweet kids peddaling the goods? I once set up a lemonade stand with Jovie and Logan and it was a financial failure. But the kids had fun, neighbors stopped by to say hello and we had people waving as they drove by!! So whatever the reason for fundraising, make it fun!! Instead of dreading the latest sale, get involved and let your kids help out. Is the random $19 they make from the bake sale really going to make a dent in the air-condioner fund?? No, but that's not the entire point. Kids enjoy helping and allowing them to see the work that goes into earning money teaches them a lesson...it doesn't grow on trees! So collect your supplies and get that stand going!


Thursday, August 2, 2012
Potty Talk
Ok, ladies. Brace yourself. I am going to discuss the dreaded topic that inevitibly comes with rearing little ones...potty training. We all have to do it and, if you're anything like me, dread it with every ounce of your being. It is a necessary evil, one that comes with frustration, worry and angst. When to start? To Pull-Up or not to Pull-Up??? Potty seat or not? Having successfully potty trained two and knowing many others who paved the way, I've got some insight for you. But first, let me back up a bit. Before we delve too deep into the poetry of potty, let me say this: I do not think my way is the only way or the best way. My method happened to work with the first so I did it with the second, simple as that. It worked early, and without much effort on my part. I started around 18 months and they were both potty pros before their second birthdays.
There are many different theories surrounding how and when to start this process with children and of course you, as their parent, know the most effective way for your child. What works for one doesn't work for all and there is no "normal" or "right" age. I have a few tips that worked with mine that will hopefully make your journey to the john a little more pleasant. If it doesn't work at first, try, try again!!
- Decide when you will start and do. not. go. back. I can't tell you how many people I've known that have begun the process only to give up shortly after out of frustration. I understand the frustration. It's annoying. It's messy. But it's only going to take a few days for it to sink in. Going backwards only confuses your child. I can't give you an exact age, but mine starting pulling their diapers off and squirming during changes around 18 months and so it began. Once they are aware of what's going on with their little bodies, that's a good sign they may be ready.
- Go cold turkey. Once you decide to start, block a few days on your calendar so you can stay in and practice. Get that kid in undies and lose the diapers! I never used Pull-Ups or put them in diapers to sleep. With my kids, it seemed the more they were in underwear, the better. Or let them run naked, if your situation allows. Much easier (and less laundry!) But switching to the diaper throughout the day can be confusing and they may feel like they are "allowed" to go when the diaper is on.
- Give them water, take them pee. It's almost that easy...almost. I suggest offering more to drink than normal to give them more opportunities to try.
- Decide an amount of time to let your child "hold" it in between taking them and create your schedule around that time for a few days. Mine was 15 minues. I know, it's not very long and taking your kid to the bathroom every 15 minutes is exhausting. But it works. Yes, you will try only to have them NOT go and then they will go all over the floor a minute later. You will want to scream, punish and give up but you will not have time because you need to take them in another 15!! So clean up that mess and move on.
- Don't reward. Crazy?? Maybe, but you know what? If you have a kid who doesn't need or want to go, they won't. Candy, stickers, ice cream, you name it...these are all just distractions in my opinion. Stick them on the potty, encourage them to try and if they don't go in a minute or so, move on. It's only for another 15 minutes anyway. Now, that's not to say you can't be a cheerleader. I'm not above singing silly songs or having their stuffed animals go pee too, just be careful about rewards. It may teach them to try when they don't have to, just for the sake of that Skittle...
- Conversly, don't punish or make a big deal if they have an accident. Seriously. Clean it up and move on. They are not peeing on the floor to punish you or drive you to the brink of insanity. They are toddlers with no bladder control and have to learn and work really hard to hold it. Keep that in mind and NEVER punish, make negative comments or threaten them when they have an accident.
That sums it up. Honestly, it's a lot of work but soooo worth it when you no longer have the expense or hassle of diaper-duty. Good luck and hang in there!!! Here are a few more resources for when the time comes...Let me know if you have questions!!
http://www.babycenter.com/toddler-potty-training-advice
http://www.parents.com/toddlers-preschoolers/potty-training/
Wednesday, August 1, 2012
Let Them Cut
What parent doesn't want their kids to end up healthier, smarter and happier than they were as a kid?? I'm no exception. As parents, we do our best to feed them the freshest, most nutritious foods so they grow healthy. I know a lot of parents who swear by eating only organic, locally grown food but what about their little minds?? Are we feeding those too?? Being more creative than book smart, I'm hoping to teach my kids and help them to flourish in areas where I fell flat. I will admit, I didn't learn all seven continents until my adult years. My hubby will NEVER let me live this down...quiz me on which country belongs where and I might still struggle. I'm not proud of this. And math?? Forget about it! So began my quest to raise a pair of smarty-pants!
After agonizing for months, my hubby and I finally decided to attempt homeschool for Jovie starting this year for pre-school. I figure it's a good place to start. I probably can't screw up too badly and if it goes well, will give us good footing to start kindergarten. So beginning this month, I'm going to commence lessons officially with Jo three days a week, although let's face it, I've been teaching the girl her whole life! This new venture will just be a bit more...structured. I tend to go full-speed in many different directions with Jovie but she loves it! Book reports on Sacajawea one day, learning about Helen Keller and the greek alphabet the next. So far, so good. It might be the whole schedule thing that becomes my biggest hurdle. So with school looming and my brain racing, I decided to start with a few projects this summer to give Jo a taste of what's to come. Where better to start than with those darned continents??
This is a great project for little ones just gaining coordination as they will be using scissors and honing their writing skills. This project is not only fun but super educational. It allows children to begin to identify countries on the map and discover that there's a whole world out there. I started with the states about a year ago and suggest you begin there too. You can teach them the "Fifty-Nifty United States" song and pull up images online or buy a map to stick on the wall and learn about different states. I had Jovie make a "state notebook" focusing on one state per day. I had her write the name of the state and draw the state flower and bird. It was a hit! So start there and when your child is ready, move on to continents. I drew the shape of the continent, had Jovie write the name of it and cut it out. We taped all of them on the wall, giving her a great way to visualize the rest of the world. Your lessons can be very simple but don't hesitate to do projects out of fear that it may be over their heads or unnecessary. Even if they don't retain everything, it gives kids a great foundation so why not? Here she is:

Subscribe to:
Posts (Atom)